This topic assumes you have followed the basic lessons for mask creation.
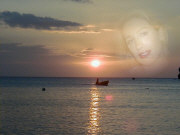
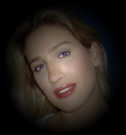
This example will walk you through creating a mask that will super-impose one photo on another, like the
example shown at the top of this page.
Once this mask is created, it can be applied to many photos at once in PhotoELF's Batch mode, in the
main program. See: Batch Apply Masks
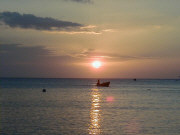
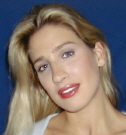
In this example, we will merge these two photos:
Step One:
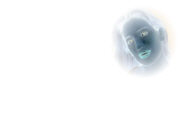
Load a picture into the Editor and apply a black circle mask:
Apply a black circle mask
To produce this image
Step Two:
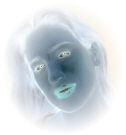
Once you are back in the Editor, look in the Photo Effect tool panel and click the negative or invert colors
button:
Changes This
To This
Step 3:
Click the Print button on the Editor's toolbar to load this image into the PPL print window. We will use the print window to merge this
photo into a white background canvas.
If you will be applying this mask to photos that are oriented landscape, then make sure the page layout is in landscape mode.
And vice versa, if you will be applying this mask to portrait photos, make sure the page layout is in portrait mode.
While in PhotoELF's Main program, display the photo we just created in the PPL Print Window.
Load it into the Editor.
Look in the File menu and select: Save as a Mask
Step 5:
Load any photo and apply this new mask to it, using white as the mask color. The following will be the result:
Remember the Mask Rule: Masks are stretched or squished to fit the size and shape of the photo it is being applied to.
This means that if the shape of the mask does not match the shape of your photo, the mask image will be distorted slightly.
Refer to Lesson 4: Mask Behavior
If this is the case, you may need to crop the mask to be the same shape as your photos.
Get ready to have your eyes glaze over... we are going to do some math:
About rectangle shapes:
Rectangles can have any height x width dimensions. Your mask is a rectangle and your photos are rectangles.
If your mask does not have the same basic dimensions, it will be stretched.
Let's say your photos are 2000 pixels wide and 1500 pixels high.
This is the rectangle shape of your photos.
We need to calculate the height to width ratio of your photos.
Get a calculator and divide the smaller number by the larger number:
In this case: 1500 (divided by) 2000 = .75
Your photos have a height to width ratio of .75
or ... the shorter side is 75% smaller than the longer side.
What does this tell us?
We need to make sure, that when we make a mask, we make the mask match the height to width ratio of your photos.
You can crop your mask in the cropping window using a cropping ratio of 7.5 x 10 That would produce the same shape.
Or when you create your mask, choose a pixel size of 750 x 1000 pixels.
Or if you create your basic mask in the print window, use the Canvas Mode and select a size of 7.5 x 10 inches.
 (see: Canvas Mode for more info)